by deadbeat March 5, 2019
How To Make A WordPress Website
(In Your PJ’s in Under 1 Hour)
If you are getting into online marketing in 2020, you need a website. Right now. It’s the little automated income generator that’ll be sending you”cha-ching” notifications to your smartphone while you sleep.
Personally, I turn those notifications off while playing Call of Duty at 10am on a Monday, but they really are nice to hear!
So if you are busting out of the 9-to-5 so that you can potentially earn more (lots more) while being lazy, then you’ve landed on the right article, my friend.
Actually, I was pulling two HotPockets out of the microwave just now. I need my deadbeat rocket fuel.
Here..
… this one is for you.

Now listen (speaking while chewing): just a few years ago, anyone who wanted to learn how to make a website from scratch needed to be alumni at Einstein University.
Today, kids are making websites in their parents’ basement. It’s easy! That’s because you just click a few buttons and the website pretty much makes itself.
So let’s get started!
Step 1: Think of a Name
First, to make a website, you don’t just walk into a liquor store and buy one. If you remember what it was like to get your driver license as a teenager, standing in line at the DMV to get your plates registered, and then finally having the long open road all for the exploring, that’s what this is like.
We will need to cook up a good name for the website, and then register it. Make it official and stuff.
Let’s get to it.
The name should follow these rules:
- keep it short, like the name of a movie. Nobody wants to say, “I bought these headphones online at HighFidelityHeadphonesForYourFavoriteListeningPleasure.com”. Yeah. No.
- avoid unique names or hard to spell words. “PlentyPuzzles.com” works a lot better than “KassandrasConundrumCastle.com”(how many ‘s’-es are in Kasandra, and is it Cassandra with a ‘C’…I forgot!)
- avoid numbers or dashes, since people don’t like to type a bunch of stuff on their keyboard. If you go with “best-car-reviews-online.com”, you will probably annoy a few folks. “Carreviews.com” works relatively better. Get it, yet?
* By the way, I made up all these examples. If those websites exist, it’s sheer coincidence.
When thinking up a website name, what I like to do is search on Google for “domain name generator”, or even “domain name suggestion tool” to help me get the cretive juices flowing. Pick a name generator out of the hundreds that show up, and type a word or two that is related to your website topic. You want to choose words that a visitor would use to find your website. Think like your visitor and this might help stir ideas.

Here’s a list:
Panabee
LeanDomainSearch
Namestation
Nameboy
Domainr
NameTumbler
Domainsbot
You have your name picked out? Good. This is your ‘license plate’ I was talking about earlier. Let’s get it registered before somebody else takes that name.
Step 2: Register Your Domain
For this, you are free to choose any domain registrar company that you find. I like Hostgator, to be honest. I’ve used them for years, registered dozens of websites and they also do my hosting (I’ll explain that next).
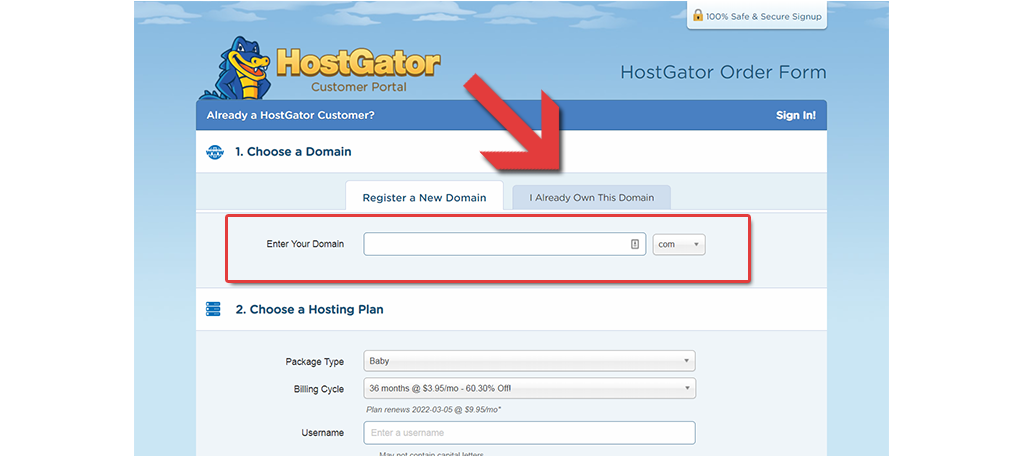
In this example, I am registering my website name in the HostGator DOMAIN section. Just so you understand the lingo being used, what I call “website name”, they call “domain”. It’s the technical word for it, so get used to both.
If you’ve ever heard someone say “I am the master of my domain”, they mean they control their territory or property. A domain means the exact same in the internet world.
Your domain = Your (digital) territory
You can enter yours in the same place shown here:
I would highly suggest you pick a “.com” website 100% of the time. If you insist, or your name is already taken as the “.com” version, the next best choice is “.net”, but people almost by instinct assume a website ends with “.com”.
Can you see a potential issue?
If you opt for the “.net” version, chances are that people will naturally type “.com” as an effect of being top of mind for them. If your competitor has the “.com” version, you just potentially sent them a free visitor.
You can create a variation of the original name that you wanted if it’s taken, by adding one extra word here and there, like “best”, “my”, or “online”. Be creative!
- BloggingShoes.com vs MyBloggingShoes.com
- PopcornAndSalt.com vs BestPopcornAndSalt.com
- (your name).com vs (your name)online.com
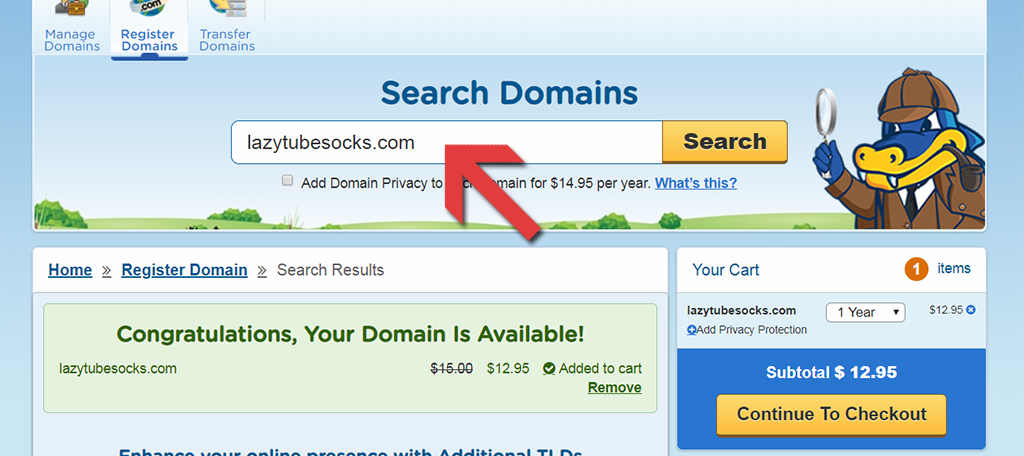
Next, after the search is performed and your name turns out available, you are prompted to buy it.
Beware, they will add some features and extra services that you don’t need at this moment, so uncheck those extras. Your price to register the domain (“website name”) should cost $12-$15 or less. If you see a higher number, look for the check box and remove the extras for now. You can always add them in the future, like Privacy Protection, etc.
Heads up: You are going to make 2 different purchases in this entire process. Both are necessary but relatively affordable. Besides, I don’t consider this a cost as much as an investment, because it will make you money if you ultimately use the site for income.
Next, create an account or login if you already have one. Get that credit card ready, or use PayPal from their tab choices.
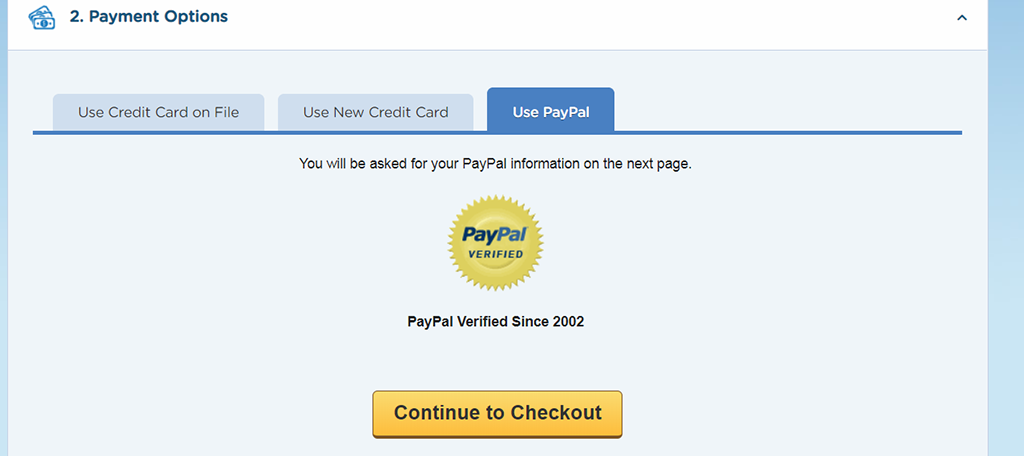
Click Continue to Checkout and follow the steps until the end.
Congrats! You’re halfway done. You are now the registered owner of that domain name.
You don’t have a website. This is just the name for it. To build the website, we will need to..
Step 3: Let Your Host Serve Your Guests
If you’ve ever had a big family party, then you know what the term “host” means. It can refer to both, the physical location where the party is going down (as in, “hosted at 123 Deadbeat Ave”), as well as the person responsible for running the whole thing (as in, “the host will be serving dinner soon”).

With a company like HostGator, they are taking what you prepared and serving it on your behalf to the entire world. Every day, all day. Whenever Deadbeat Jane sits at home and wants to read your latest funny blog post, she types your domain name (website name) into her computer, and your host will go fetch that article and send it to her in less than a second (literally), so she can read it!
This happens even if you’re knocked out for your midday nap.

And if she buys something from your website while you’re asleep on a sandy beach, you just made passive income – and that is the goal of The Deadbeat Revolution: to show you a way to make a very comfortable living by using the power of the internet. My course teaches this in more detail.
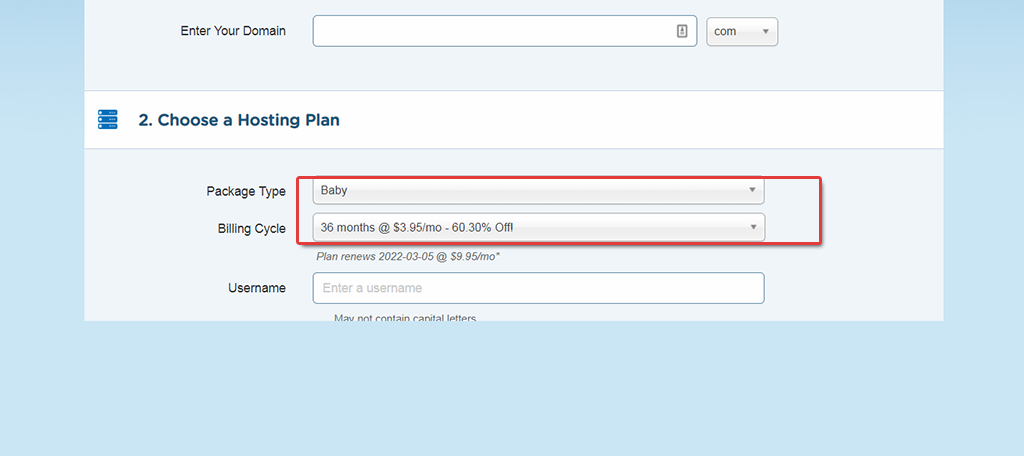
Hostgator gives you three packages, each cleverly named with regards to their alligator character: hatchling, baby and business.
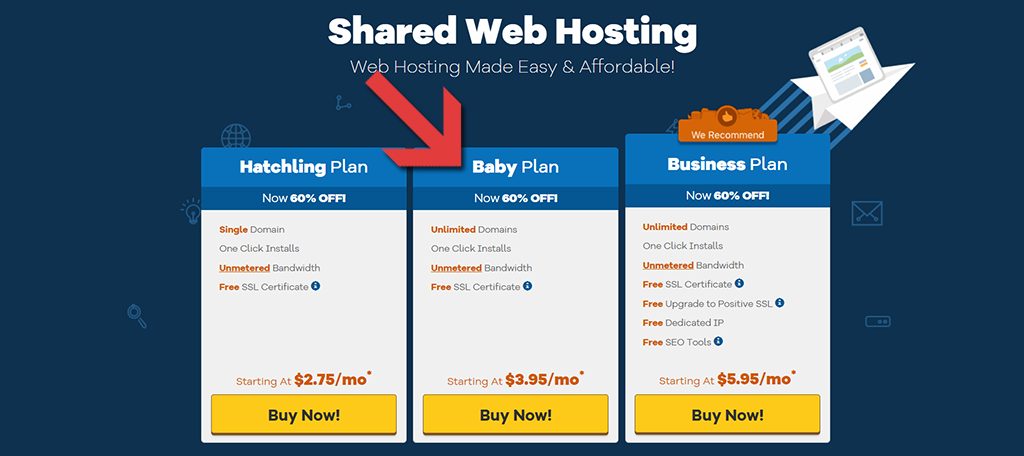
While you might consider yourself a total beginner, you could choose the most economical Hatchling plan, but look closely at what you get.
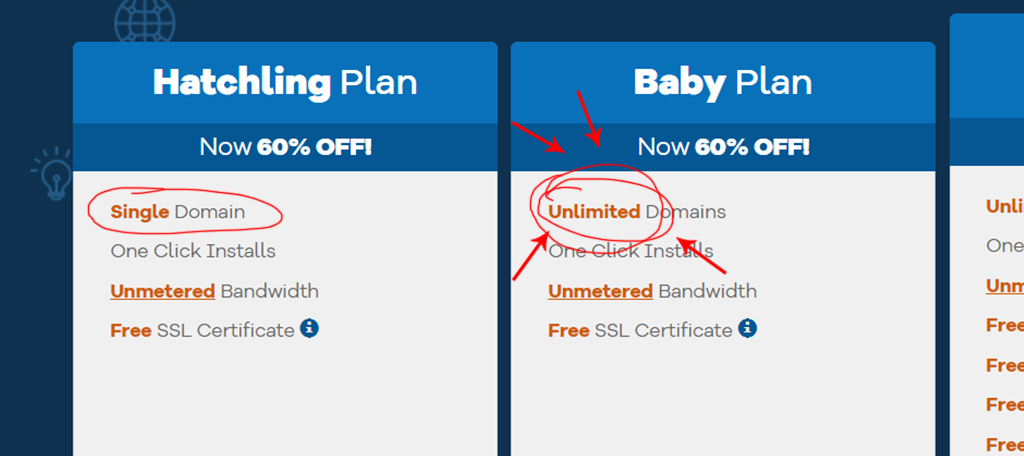
The Hatchling plan allows only one domain. Chances are you will end up buying a few more domains during the year and into the future, as part of the learning process or to grow more online businesses.
If you start even a second web domain, using the Hatchling plan would require you to buy another hosting plan all over again.
I believe it makes life easier to pick the Baby Plan (the middle choice), and simply place all your domains for now in this one single hosting plan. It’s smart. It’s future-proof. It’s up to you.
After making your selection, the next window asks about what domain you will be hosting. Since we bought a domain in the previous step, we already own one and so I will click on this second tab to proceed.
Enter the name of the domain you just bought. It will show up as “Added”. Now let’s scroll down to the Hosting Plan step.
By default, they might suggest you pay for 36 months up front. If you can afford the lump sum now, that’s a good choice. I will pay month to month, and this is $11.95 for this checkout process.
Enter your billing info or select to pay with Paypal.
At the very bottom, the final step, they will have extra services for you. Some are checked off by default. Remove them, as we don’t need anything extra at the moment. You can add these in the future if you want them.
The total is just under $13 bucks for me. Check the Terms of Service box and you can checkout.
Congrats! This was the second of the two payments needed to set things up. We are 50% there, my friend!

Your website has a name and it is being hosted! What’s next?
If you said, “write my first article and fill it with cool stories and pictures“, you’re right!
But unlike your home computer, a website isn’t just a large folder that saves your articles, movies and family photos.
Your site has to present these to the world in a natural order from newest to oldest article, and also not take you any coding to do do any of that.
What we want is to hand off a new article to our website, and let it show it publicly as your most recent work of art, while also pushing the older ones out of the way.
There’s a tool for that.
It’s called WordPress (like the old “printing press” machines that used to print books and newspapers). Once you have WordPress installed, you will be just minutes away from seeing your new website live!

Step 4: Press Your Words – with WordPress
WordPress isn’t just a text editor for typing out your articles. It also gives your website a skin, of which you control it’s colors and styles, among many other settings.
Also, it can be beneficial to allow your readers to leave comments after they enjoyed reading your work, and it’s WordPress that will notify you when someone left a comment and give you a convenient place to see them, approve or reject them.
And if you’re selling products on your site, you probably want the layout of the product page to look and function very differently than your article pages.
WordPress is also the same tool that will let you give shape to this product page. WordPress is your deadbeat bean bag chair from which you manage all aspects of your new website(s).
It’s not like anything you’ve seen or used before. WordPress is it’s own thing.
You don’t download it onto your computer, like other software. You install it directly onto your website, but no one will see it except you. And you will need to log into it with a password to access it. You’re getting cooler by the minute, with your fancy passwords and websites!
The password makes it so you are the only one with permission to write and publish articles to your website, as well as make other changes from inside of WordPress.
As soon as you register your website’s name and your payment goes through for your hosting, you can immediately begin installing WordPress and publish that first article!
It’s one of the most exciting moments to experience: the birth of your first website (and second, and third, and so on)!
My hosting company, HostGator, knows that people like to install WordPress asap, so they even have a Quick Install button.
This is the fastest and easiest way to get things rolling. Because you might bump into some technical questions in order to move forward, I will be walking you step-by-step through this part right now.
So make yourself some warm coffee and reach for a second bar of deadbeat rocket fuel (HotPockets) and flop down onto your favorite lazy chair, ’cause here we go…

By far the most direct way to get WordPress into your hands is through your new HostGator account.
Hostgator has what is called a Control Panel (“cPanel” for short). Get used to the cPanel — it’s where you will adjust anything and everything about your domains.
When you paid for your hosting plan, a very important email containing your info was emailed to you, including the username and password to get into this control panel.
I recommend saving a link to your cPanel and other useful Hostgator links as bookmarks on your browser. Here’s one way to do it:
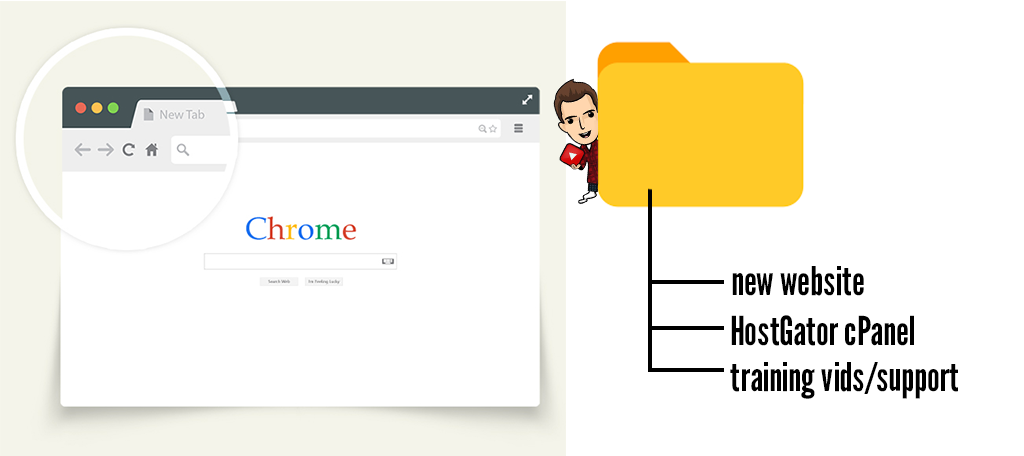
- cPanel https://gator4055.hostgator.com:2083/
- support videos and articles https://support.hostgator.com/
I logged into my cPanel. On the left side is what I like to think is a big red toolbox with multiple drawers.
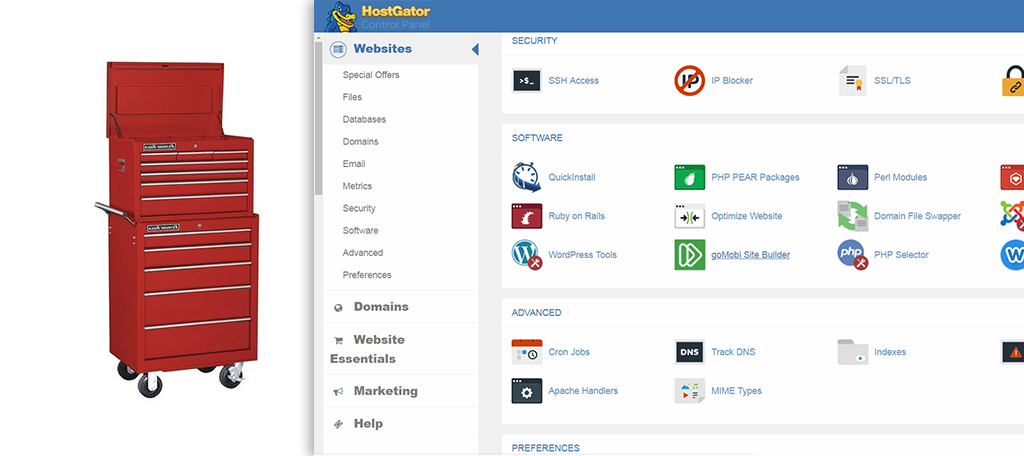
Clicking on each drawer shows you all the tools inside it. To install WordPress, I am looking for something called QuickInstall, which is in the Software category.
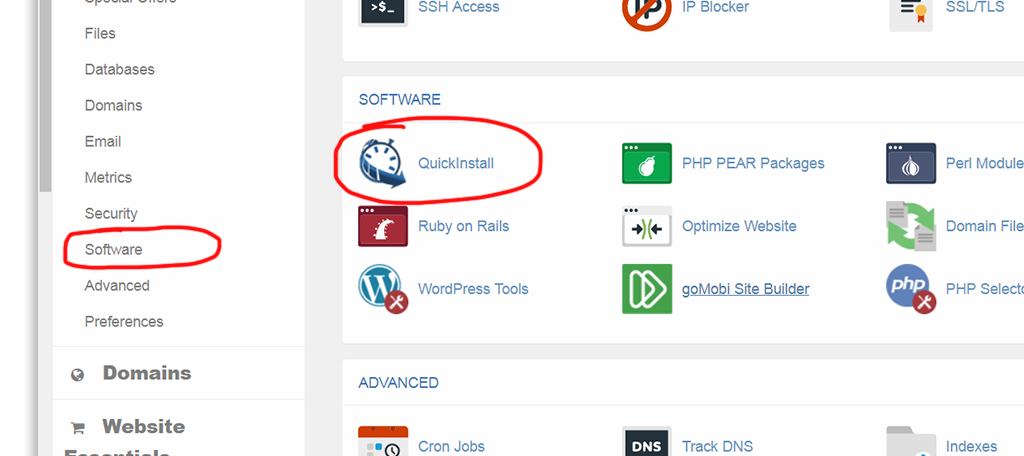
Click Software, and look for QuickInstall. The icon is a stopwatch with an arrow flying across it.
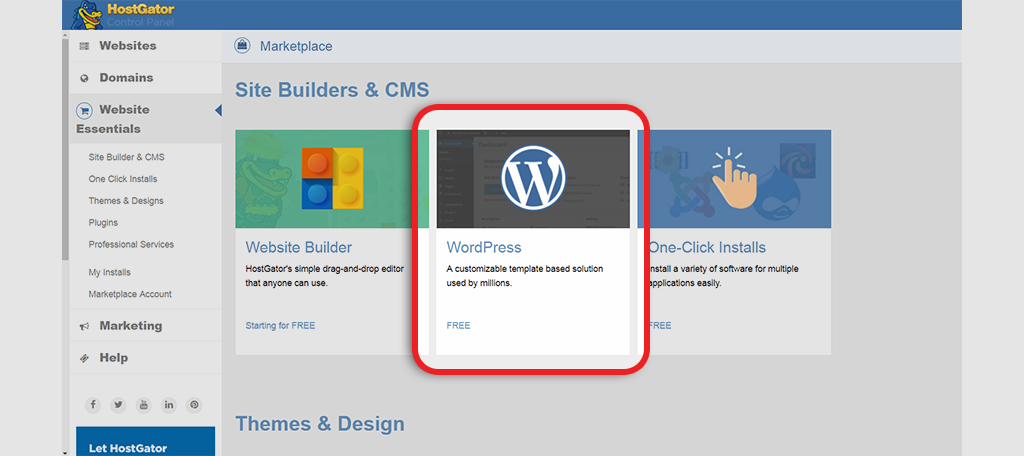
Under the “Site Builders & CMS” heading, I see three options. We will do a free WordPress installation. Click on that.
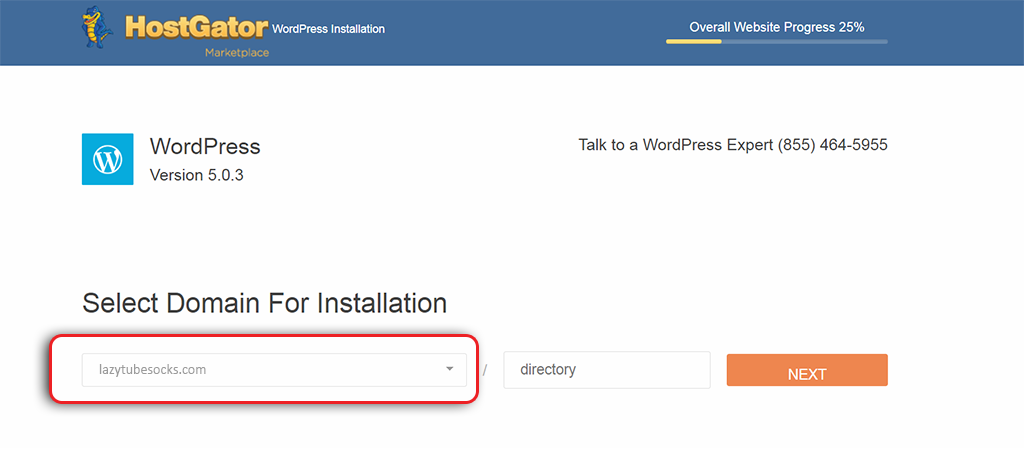
Next, use the dropdown menu to select the domain you just bought. Leave the other box empty. Click Next.
Alright, in this step we are going to assign ourselves as the main administrator and only person who can use WordPress for our site. So give your WordPress a Blog Title (this can be changed later) and enter whatever name you want to use as your admin name (first name is fine).
Leave the check mark on “Automatically create a new database for this installation” as we need databases to record visitor comments and other stuff.
Check the Terms of Service Agreement box, and we are now allowed to click the big INSTALL button: the moment of truth!
This is it!
Ready?
One.. two.. THREE!! CLICK IT!!
Alright, sorry for being so dramatic. It’s like that moment where you are handed the keys to a new car. Very exciting indeed.
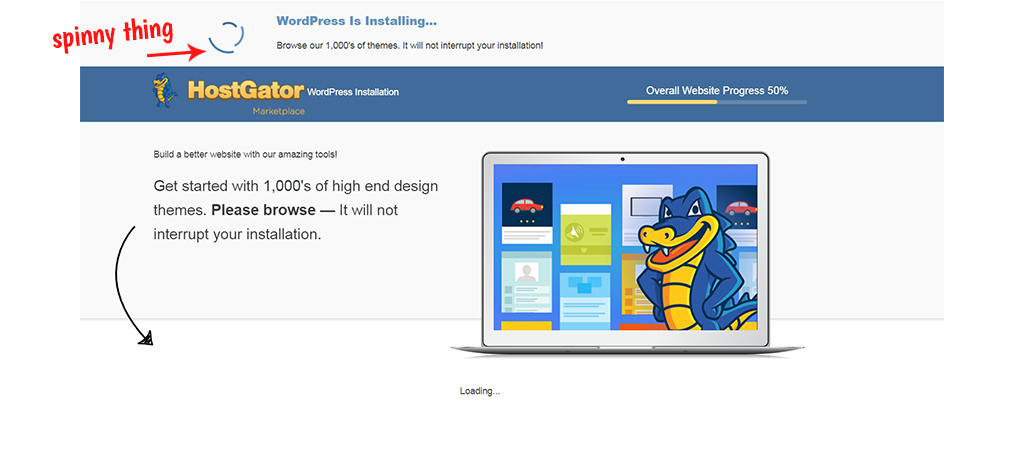
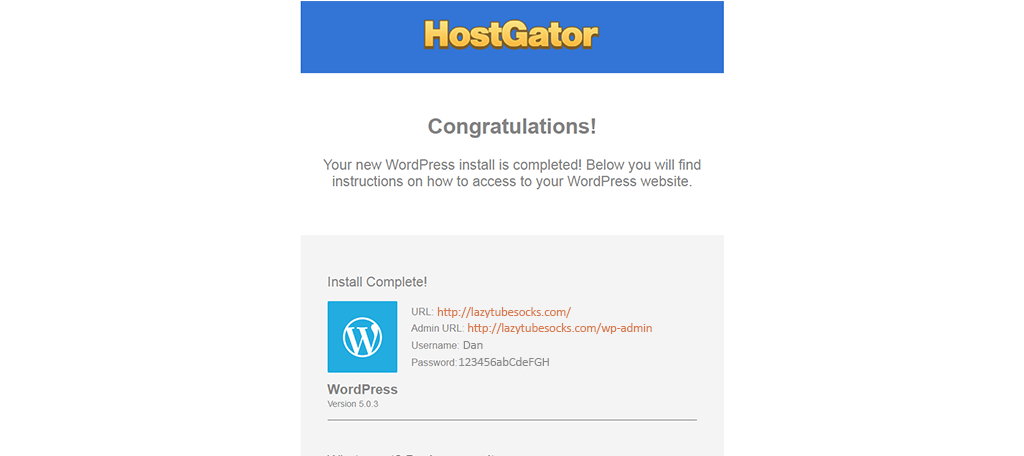
You will see this spinning symbol (image above) at the top of the page while it installs. For me, this took literally 5 seconds of waiting, and then it was done. It spits out the Installation Details, which you should write down.

These are your login details. Also, an email should have arrived in your inbox with these.
I can’t wait to look inside, so click on LOGIN to get into your new WordPress installation!
By the way, you can also bookmark this page, since you’ll be using it to login often. It’s simply your domain, slash, “wp-admin”, or whatever the email tells you it is.
After entering my user name and password, this is what I see: voila! Isn’t it gorgeous? You are inside WordPress and ready to rock!
Are you thinking what I’m thinking?
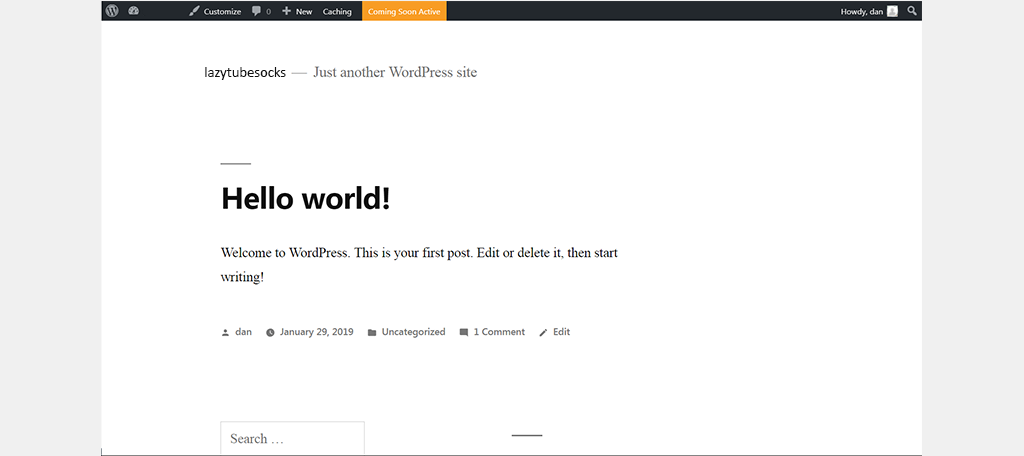
We are 99% of the way there. You can actually see what your website looks like out of the box right now.
Hover your mouse on the upper-left where you see your name. A dropdown menu appears and you see “Visit Site”. Click it and behold: your new website!
Well, maybe you don’t see anything, yet. Or maybe you do!
That’s because whenever you register a new domain and get your hosting setup, it can take a few hours for all the wires to get all connected, so to speak.
Either way, you don’t need to contact support if it’s blank or you see a message about it being temporarily under construction (or something to that extent) for this until after 24-48 hours pass.
In my case, it seemed to work instantly. Lucky me.
Let’s get back inside WordPress and…
…write our first article!!
Step 5: Write Your First Article
That first page that seems to have created itself all on its own — it’s a dummy page.
A placeholder.
Let me show you where it lives. Here, under Posts.
It’s the one notoriously called “Hello world!”. Everyone who installs WordPress for the first time gets one of these. Just to have something to show the new owner: you.
Let’s edit the heading really quick, just for fun. Hover over the post name. Click Edit.
You’ll arrive at what looks like a word processor, like Microsoft Word. I’m going to change what it says and update it. Publish it.
both terms “update” and “publish” mean you will make it officially viewable to the world.
Click ‘View Page’. Hey, check it out! It’s live!

Let’s see how a new article can be created, like writing a new page in a book.
Let’s return to our WordPress dashboard by hovering over your site name, and then select “Dashboard”.
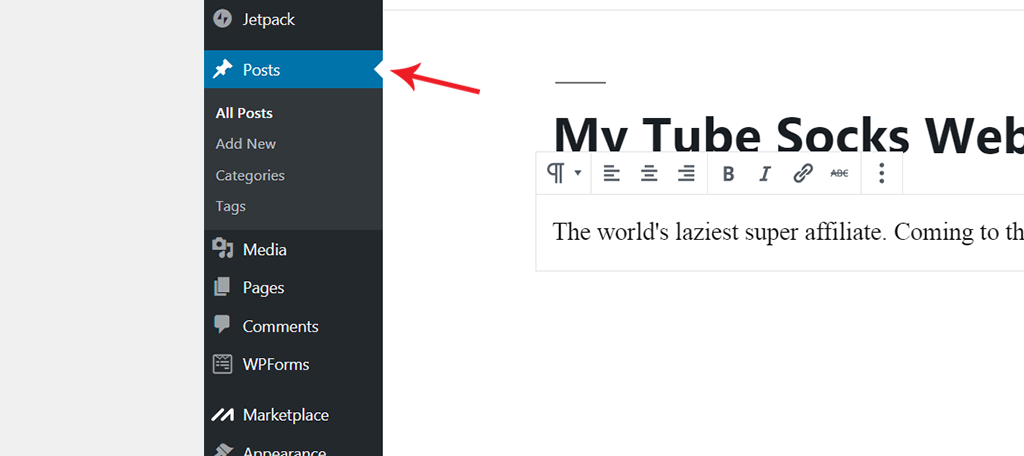
We’re back at home. In website lingo, an article is also called a post. They mean the same thing. To access it you can hover over Posts but I just want to get straight into the panel so I will click directly on the word Posts.
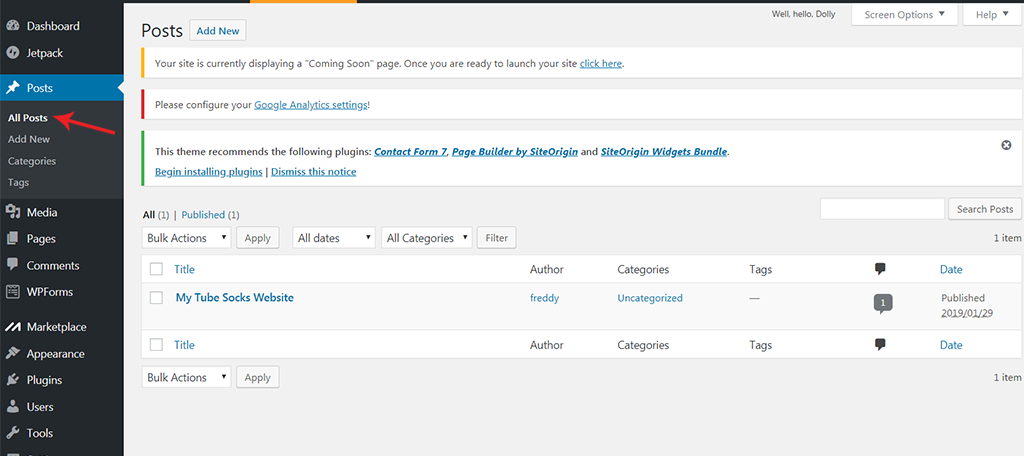
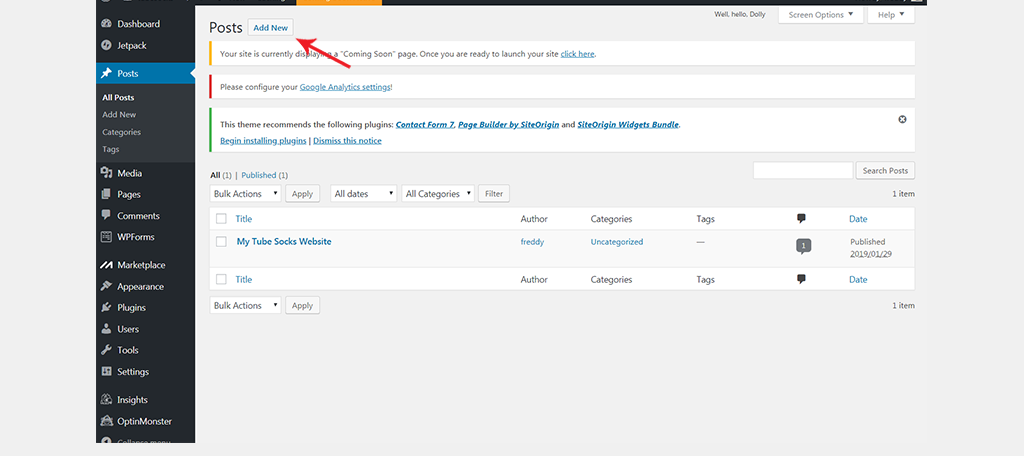
I can see the default post that came with WordPress, and I obviously changed the title and text. I can see it here. If I had 50 articles, this is where I could see them all listed, and also how I could change them. My new baby website has but one article. That’s great. Click “Add New” near the top to add the second one.
We are taken into a text editor, which sort of feels like Microsoft Word or maybe Notepad or something like that. To test out some of the features, I will throw in a header, image, video and text element.
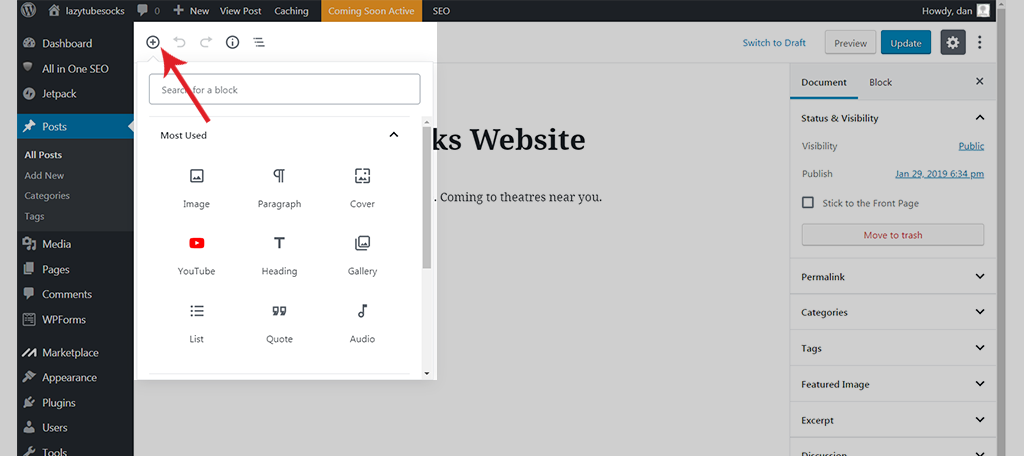
The heading is something clever. The image I got for free from Pixabay. My text is a single sentence for now, and my video will be my latest youtube video, whose link I copy straight from the youtube address bar.
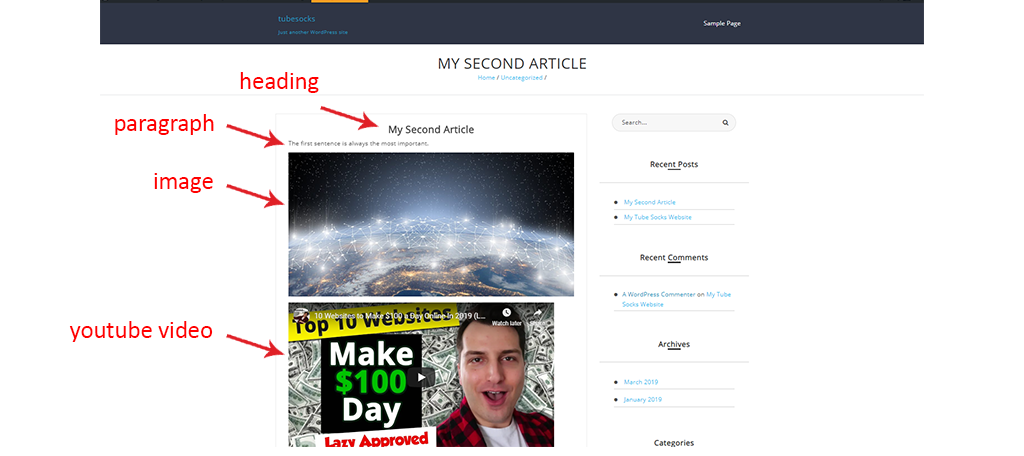
Hit Publish and we are done (you’ll be prompted twice). Click View Post and behold!
BONUS: Themes + Plugins for WordPress
Well, you really did it! Together, we came a long way. Most people shy away from doing something like this, but as you witnessed for yourself, it was nothing but clicking a few buttons.
That out-of-the-box style, though, is very bland. Too basic. Let me get you started on installing Themes and plugins.
The theme is what gives your website a certain look. It changes not only the layout but also the colors. Any extra features you want on your site, the bells and whistles, are added through plugins.
Plugins are like apps on your phone.
You want to order food, use a calculator or clean up memory space? On your phone you simply install an app for that. On WordPress, it’s plugins.
Let’s add a theme. They can be free or paid. Let’s stick with free for today.
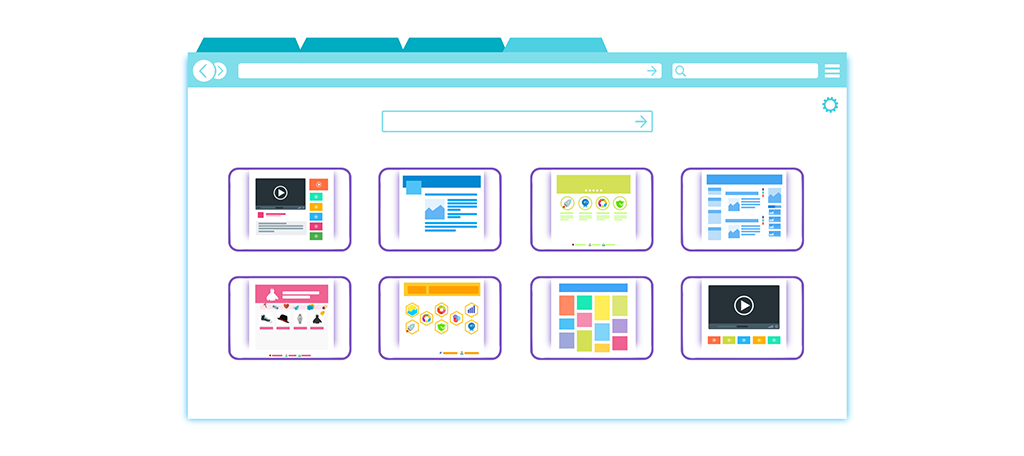
On your left sidebar, hover over Appearance and click on Themes. The default ones that come with WordPress are named after the years, so the one I have currently active is Twenty Nineteen, but you also se Twenty Seventeen and Twenty Sixteen.
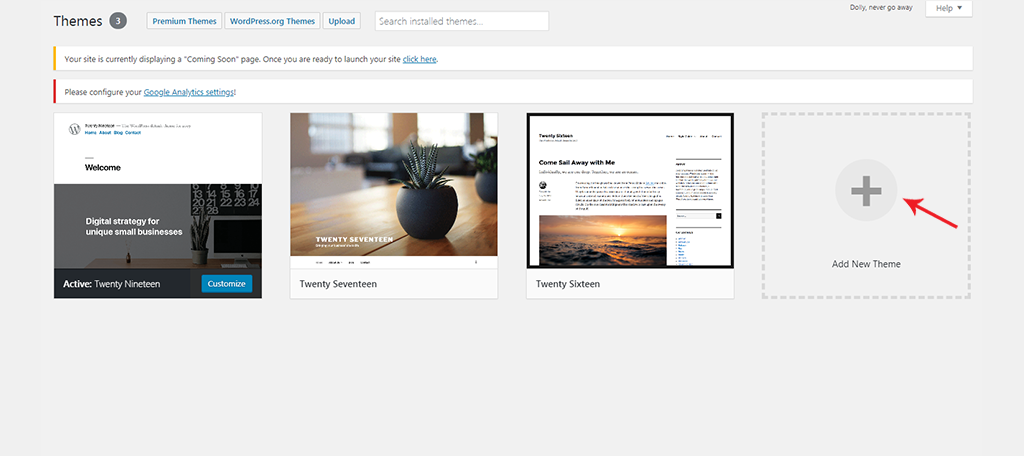
All these look pretty similar, so let’s find something with a bit more pizzazz. Select Add New Theme.
At this point, whatever you choose is fine. Chances are you will change this for a much nicer (and likely paid) version in the near future.
Randomnly, I select “Romana” as my theme. This is always a 2-step process: Install & Activate.
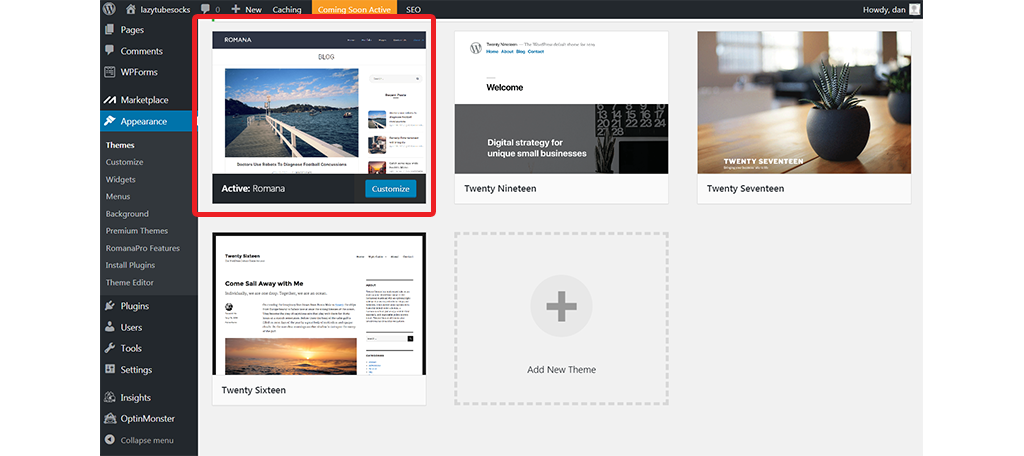
Install downloads it and makes it available for you, but it doesn’t make the switch, yet. If you are ready to commit into changing out the old for the new, then Activate will do the trick.
This is like removing an old coat and putting on a nicer looking one. The contents of your website do not change or get replaced — only the appearance of it changes.
Good work! I think we’re nearly complete.
Oh, yeah… let’s add one plugin. There are so many you can add, that it can be addicting, but fight the urge to install tons of plugins as this can considerably slow down your website (which makes a very bad experience for the visitors).
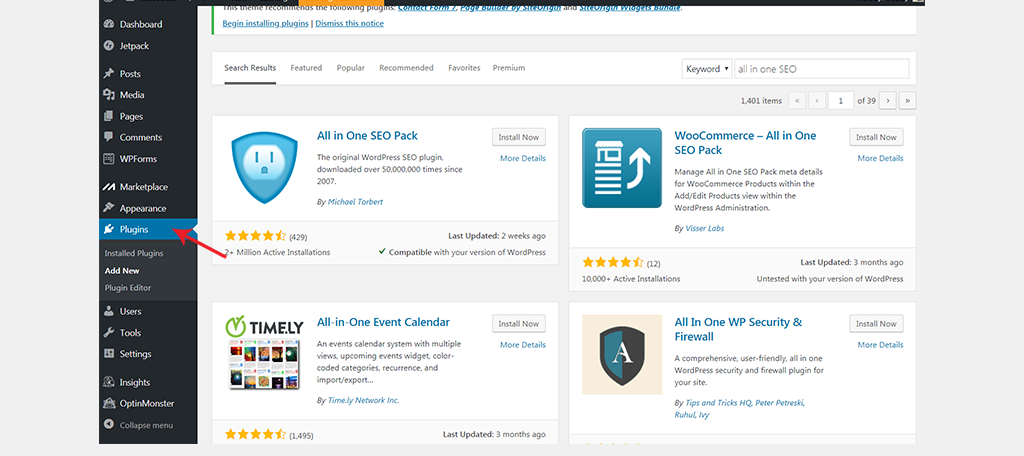
On the left, hover over Plugins > Add New. This is an endless library of literally thousands of plugins. Some free. Some paid. Some basic. Some very complex.
I recommend installing a plugin called “All In One SEO”, so let’s type that into the search box. As you type, it immediatley begins hunting for it. The one I want is this one here, by Michael Torgert and it has this logo next to it.
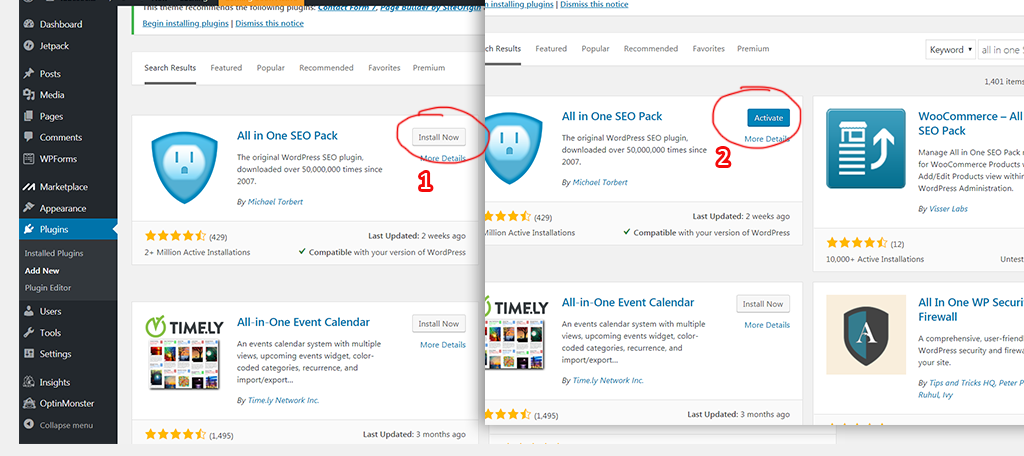
Just like when we installed a new theme, this is a 2-step process: Install & Activate. Let’s do both.
You did it! You are 100% complete.
I hope you are still as excited as I was when we started cooking up a website name a few minutes ago. It’s been quite a journey, and we’ve got many more great things ahead. All very worth your time. Let’s review before we part ways.
- You thought of a domain name and then registered it (mine was www. LazyTubeSocks .com).
- You got that domain a hosting plan (Hostagor “Baby” hosting, the middle option)
- You installed WordPress using QuickInstall through your cPanel (control panel).
A new theme was installed and activated to replace the boring/plain default one. - You edited the default sample article (post) and created your own
- Plugin was installed.
I think I gave you the pizza HotPocket. I got the ham & cheese one. And to be honest, I’m gonna microwave myself one more. It was so tasty.
Afterward, another nap for me. Phew!.. I’m tired.
But tell ya what, I really enjoyed helping you build a website. If you were exhilirated going through this together with me and you made it this far, I extend a friendly invitation to meet the rest of the deadbeats who are reading this article along with you as you read this very sentence. Join Deadbeat Revolution.
Later!
- 49Shares
42 7